-40%
70mai Smart Dash Cam Pro DVR Car Video Recording Global Version Dashcam Recorder
$ 38.5
- Description
- Size Guide
Description
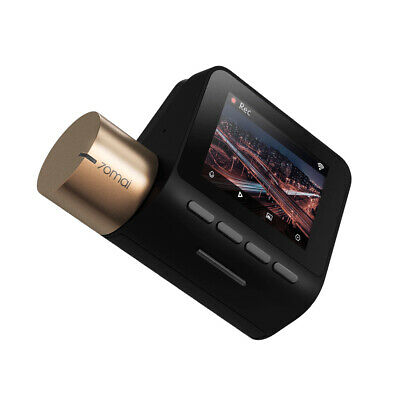
Global Version 70mai Dash Cam Lite 1080P HD GPS Module Car DVR Camera Wifi 24H Parking Monitor Dashcam Car Video RecorderFeatures:
2.0-inch
LCD screen wide viewing display
Superior
night vision
, auto-adjusting light before recording.
1080P(1920*1080) Full HD
dash cam,
FOV 130°
field of vision
24H parking mode
monitoring with built-in
G-sensor
WDR technology can adjust exposure balance
Support
loop recording (GPS module and TF Card not included)
70mai
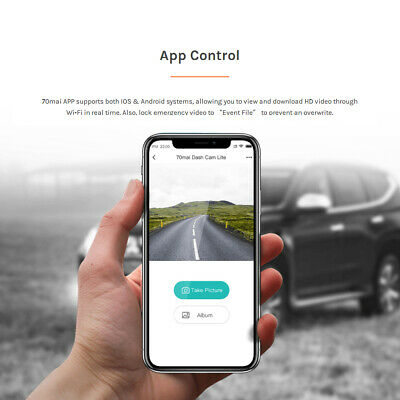
App control
, compatible with IOS & Android systems
APP Language: English, Russian
Record status light display:
Green Light
-Record Normal
Blue Light
- First Start
Red Light
- Incorrect Record(Install Class 10 TF card,the TFcard not included )
Specification:
Brand: 70mai
Model: Midrive D08
Screen: 2.0inch
Image sensor: SON Y IMX307
Resolution: 1920×1080
Camera: FOV 130°
Wireless connection: Wi-Fi IEEE 802.11 b/g/n/ 2.4GHz
G-sensor: Acceleration sensor
Expandable memory: Support Class10 and above MicroTF card (16-64GB)
Supported OS: Android4.4/iOS9.0 and above
Power supply: Car cigarette lighter
Battery: 500mAh Li-polymer battery
Input: 5V/ 1.5A
Operating temperature: -10℃ -60℃
Dimensions: 82*58.2*40.5mm
Package List:
1 * 70mai Dash Cam Lite
1 * Adhesive
1 * Electric Sticker
1 * Car cigarette lighter
1 * USB Cable
1 * Cable crowbar
1 * User Manual
How to use 70mai Dash Cam Lite ?
You can click this FAQ link before use:
https://help.70mai.asia/723.html
70Mai APP:
Download the APP on the Google Play or APP store
Open the 70mai app and tap “Add Device”
Find “70mai Dash Cam Lite” in the device list, and tap the device picture to enter the connection process.
Turn on the Dash Cam’s Wi-Fi hotspot and then complete the connection according to the prompts on the app screen.
APP Language: English / Russian
Installation:
1. Install the electrostatic sticker
Clean your windshield and put the electrostatic sticker on the recommended area as shown in the figure below.
Make sure you remove air bubbles between the sticker and the glass.
2. Install the bracket
Lock the bracket to the Dash Cam, as shown in the figure below. You will hear a snap when it is in place.
3. Stick the camera mount to the windshield
Remove the protective cover from the mount and stick the mount’s base to the center of the electrostatic sticker. Make sure your Dash Cam body is parallel to the ground. Press the mount to attach it to the electrostatic sticker tightly.
4. Connect USB cable to the cigarette lighter receptacle
Align the cable with the top edge of the windshield and fasten it along the passenger’s side and the glovebox as shown below.
Connect the cable to the power adapter and insert the adapter into the cigarette lighter receptacle.
Note: The cigarette lighter receptacle might be positioned differently in your car. The picture is provided for reference only.
5. Adjust the Dash Cam angle
Turn on the Dash Cam and adjust the camera angle up and down against the preview screen to ensure that the camera is facing the front.

